Happy Sunday! Just wanted to share really quick the circle skirt I made my princess 🙂
DIY
Pacifier Holder
When my kids were infants, they preferred the Soothie pacifiers and the only pacifier holder I could find in the store for soothie’s was a big flower for my daughter and a blue penguin for my son. This time around I went looking for them for the new baby and couldn’t find any, but I did see pacifier holder with an elastic loop at you can use on most pacifiers. I decided I would make my own verses paying $6-$10 for one.
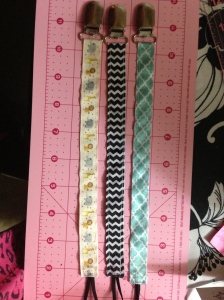
I went to Hobby Lobby and I bought 3 different ribbons and some elastic. I bought the “mitten clips” from Joann’s (these were actually for an ironing board, it came with 8 clips and was cheaper than buying the clips by themselves)
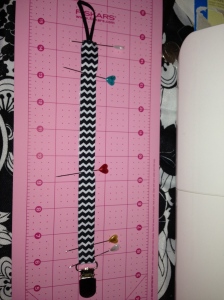
 All I had to do was cut 19″ of ribbon, burn the cut edges, then loop the ribbon through the clip placed a pin to keep it in place. Then folded in the top edges in and added a small piece of elastic, pin that and sewed it closed. I sewed down the sides and across the bottom where the clip is at, the back up of the other side. Voila.
Feeling crafty
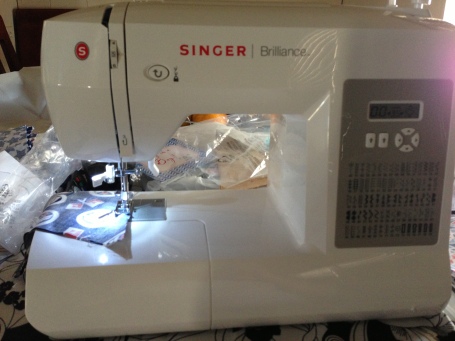
For Mother’s day my husband and kids got me a new Singer sewing machine (I sold my old one 2 years ago when we moved and regretted it ever since) The new one had been sitting in the “office room”, I couldn’t think of any projects to sew. But last week my mom approach me about choosing a theme I wanted for my baby shower. Right away I choose a Nautical theme and the ideas started flowing in my mind with things I could do for the baby shower & the nursery. My mom and sister-in-law are limiting the things I can participate in the baby shower planing, so that I can be somewhat surprised 🙂 (I’m allowed to ‘pin’ things on my pinterest board). But they did let me make the invitations and a banner. We are meeting next week to finish some minor details and I will post some pictures.
Chalkboard Refrigerator
While watching Good Luck Charlie with my kids, I saw they had a chalkboard refrigerator. I instantly loved the idea and wanted one of my own.
Here is what my refrigerator looked like before:
Here is what is looks like now:
It was a time consuming project but I love it!! First we applied 3 thin coats of Rust-Oleum Magnetic Primer. We waited 4 hours after the last coat of primer, to apply 2 coats Rust-Oleum Chalk Board paint in black. (for the most part, we followed the instructions on the box) We also spray-painted the door handles a pearl white.
Then I waited 2 days before I “conditioned” it:
Old Side Table, New Look.
I have an old Ikea side table and didn’t seem to fit in anywhere. I decide to give it a fresh look so it could fit in with my Living Room Decor.
First I select the pattern I wanted to use, I cut it out and traced the pattern on the table.
After that was all done. I painted it with a small paint brush and sealed it with a High gloss spray paint.


